Yoguely is reader-supported. When you buy through links on our site, we may earn an affiliate commission. Learn more
How to Install Reverse Osmosis Water Filter System Under the Sink (Step by Step)
Today you’re going to learn exactly how to install a Reverse Osmosis Water Filter System under the sink.
In fact:
I’ll guide you step-by-step as I install a Reverse Osmosis system under the counter.
I’m your host Aida Yoguely. Let’s get started.
Unboxing the Reverse Osmosis Unit
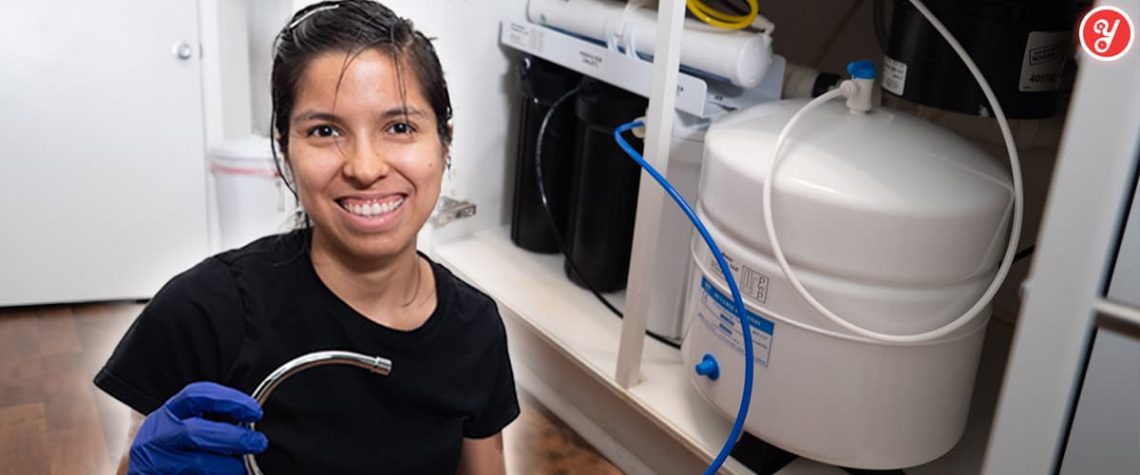
Hello my people and welcome back! ¡Bienvenidos! Let’s unbox and install a Reverse Osmosis water filter. This is to drink nice clean and good tasting water.
I purchased this particular Reverse Osmosis Unit. This cost me $388 and it came complete with all the parts needed for you to complete a free reverse osmosis installation.
With this unit, maintenance is easy. Every year I replace the pre- carbon block filter (MatriKX CTO) and the post- carbon block filters (MatriKX CTO Plus). Both carbon filters are included in this Standard Cartridge Refill Pack. I also use O-Ring Silicone Lubricant (paid link) to get a good seal.
Every 5 years, I test the TDS of the water and then replace the reverse osmosis filter (Pentair GRO 50 gallon-per-day encapsulated membrane with 1:1 drain-to-permeate) as necessary getting this reverse osmosis filter.
There are also other options for Reverse Osmosis Units, like this popular and decently priced 6-Stage RO system (paid link).
Conversely, you can also buy all the parts individually and assemble them together for a cheaper price. But getting it all, ready to build, in one big package, is pretty convenient.
It includes the Filter Housing Wrench, the Drain Saddle Installation Kit, very wordy installation instructions, the MAX Adapter Inlet Installation Kit, a Handheld Total Dissolved Solids (TDS) tester.
Interestingly you can buy really cheap TDS testers (paid link), or if you need fast shipping there are other Total Dissolved Solids (TDS) testers (paid link) out there.
The Pressurized Storage Tank comes with the tank valve and can hold about 2.5 gallons of water. Which is plenty to have good flow whenever water is needed.
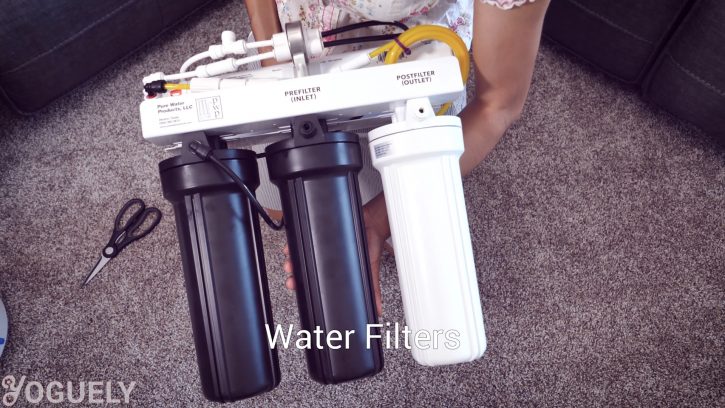
The heart of the Reverse Osmosis system are the filters. This unit comes pre-installed with RO membrane, as well as the pre-filter & post-filter cartridges. I’ll go over the filters I chose later in this post.
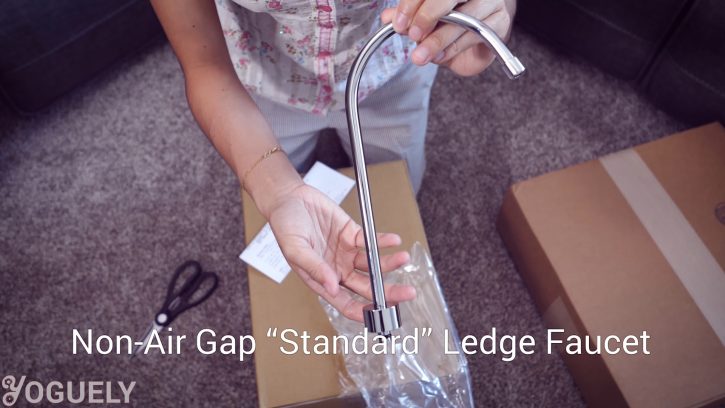
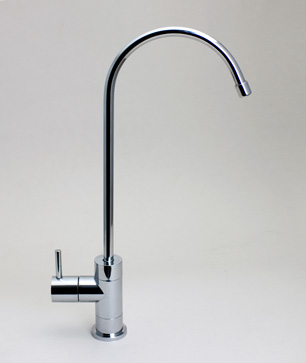
The RO Unit includes the Ledge Faucet Installation Kit. The one I have is the non-air gap faucet which is considered the standard version.
Airgap faucet vs non air gap faucet
Air-gap faucets include a safety feature that that prevents back flow from the drain line from reaching the RO system. The air-gap faucet will have an additional airgap piece, extra spacer and extra washer.
This RO system has a one-way valve in the drain to prevent drain backup so there was no need for me to get an air-gap faucet.
The installation guidelines are also wordy with a 2D CAD drawing of the faucet.
Now that we’ve unboxed the Reverse Osmosis Filter, we are going to go ahead and start installing it under the sink.
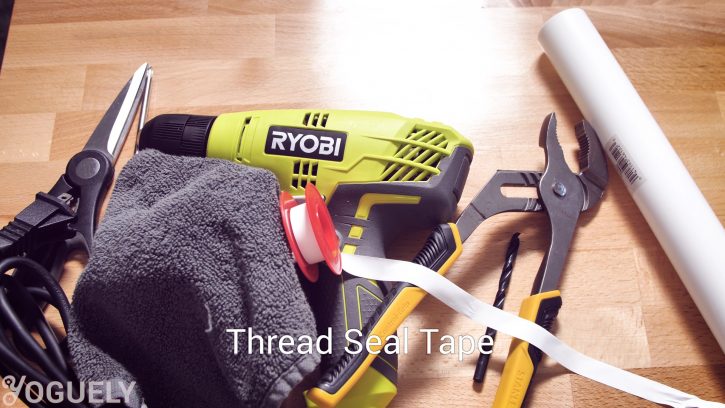
Tools you’ll need to Install a Reverse Osmosis Unit
To do this job you’ll need (paid links):
- Sharp Scissors (the ones I used in the video)
- A Phillips Screw driver
- An Electric Drill
- A ¼” drill bit
- A polypropylene or PVC Flanged Strainer Tailpiece Sink Pipe measuring 1.5 inch in diameter by 12 inches in length ( can be found in Home Depot)
- A Crescent Wrench
- A small towel
- Thread seal tape, also known as plumber’s Tape, to seal the pipe threads.
Reverse Osmosis System Overview
Before we begin the installation, here is how the system works under your kitchen sink.
At first glance the Reverse Osmosis system can seem complicated but is actually very simple.
Let’s follow the path of water as is get out from the cold-water supply line under your sink.
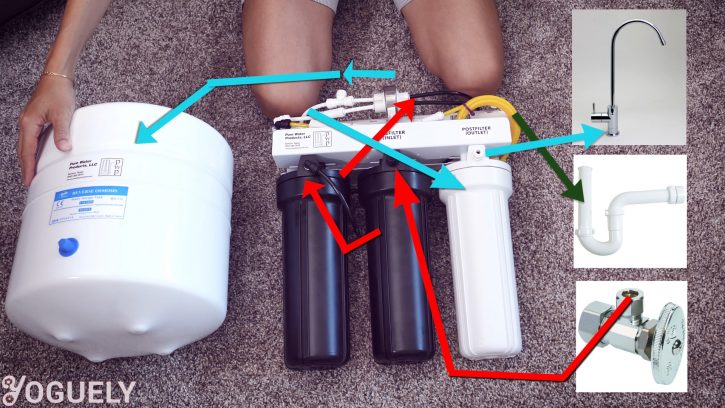
First, the cold-water enters the (1) first stage Pre-Filter cartridge [5 micron string wound sediment] through the Inlet and into the (2) second stage cartridge [MatriKX KX-CTO Carbon] which contains a carbon filter.
After that, the cold water passes through the (3) third stage which is the reverse osmosis membrane [50gpd Pentek GRO Membrane] at which point the water containing the impurities are disposed to the drain.
On the contrary, the clean water is pushed through the Shut-Off valve and into the storage tank where it sits until the moment you open the faucet.
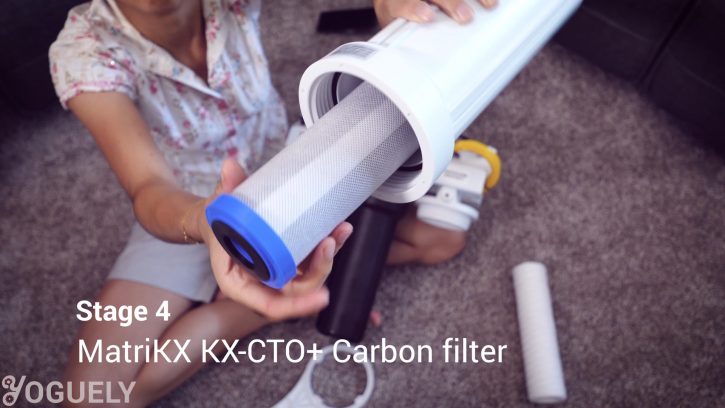
At this instant the water flows through the (4) fourth stage Post-Filter [MatriKX KX-CTO+ carbon block], consisting of another carbon filter, then out through the faucet and into your drinking cup.
Here is a pretty good flow diagram of the process.
Approach to Installing a Reverse Osmosis System
My approach is to start out by preparing the connections from the sink that will attach to the reverse Osmosis Filter. Specifically preparing the location the water comes in from, the cold-water faucet, and then preparing the drain location where the water with impurities will be disposed.
The rest of the process only gets easier. First, you’ll be connecting the inlet and the drain tubes to the RO system, then connecting the ledge faucet to the outlet where you’ll be getting your filtered drinking water, and lastly, attaching the water storage tank which will hold all the filtered drinking water when not in use.
How to Select a Spot for the Drain Saddle Outlet Pipe
This reverse osmosis water filter system is 1:1 efficient so for every one cup of reverse osmosis filtered water that comes out of the faucet, 1 cup containing the impurities is discarded into the drain.
For this reason, you’ll need to connect the drain tube which is colored yellow line in this case to the sink drain. We’ll do this by drilling a hole somewhere along these PVC pipes.
In my sink there is a vertical pipe for the sink drain, and a horizontal pipe for the garbage disposal drain. They both meet before passing through the U-shaped J or P trap in the drain pipe.
The J or P trap in the drain pipe contains water which acts as a barrier, stopping debris from clogging pipes deeper in the plumbing, and also preventing sewage gas from coming back up in to your sink.
Hence, you’ll need to drill a hole above the J or P trap.
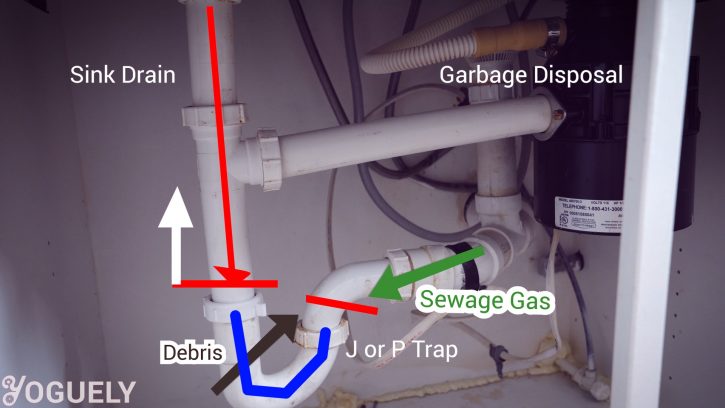
I could have installed it in the sink drain’s vertical pipe, but then the drain water would fall down and create a louder splashing sound as the drip first hits the water in the trap.
To prevent this, I decided to install it in the horizontal section connecting the disposal to the vertical pipe. Additionally, I chose this location because I plan to remove the RO system in the future and found that this horizontal pipe would be the easiest to remove and replace.
Select the spot where you wish to make a hole on the flanged sink pipe for the drain tube and drill a 1/4th inch hole.
Before operating power tools, be sure to wear safety eye wear to protect yourself from injury.
How to Install the Drain Saddle Outlet Pipe
Place the horizontal pipe back into place. Ideally place it so that the drain hole is located at the top half of the pipe. Rotate the pipe as necessary.
Punch the center hole out of the foam square, remove plastic from adhesive side and stick the foam square to the pipe so the hole in the foam lines up with the drilled hole.
Attach the black saddle around the pipe and screw in the two bolts. The foam square will seal the area around the hole as you tighten the saddle down.
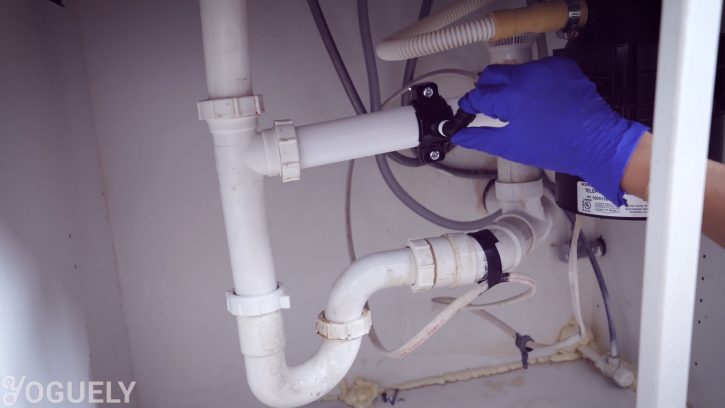
Screw in the black elbow quick connect fitting.
How to Install the Cold Water Inlet Pipe
Important to know that this faucet is only to be used with the cold water, so you must connect the Reverse Osmosis System to the cold-water supply.
First you need to turn off the cold-water valve. The lever for the cold water is aligned parallel to the flexible water line that goes to the sink, which means that water is allowed to flow. Go ahead and turn that lever 90 degrees so that it is perpendicular to the flexible water-line and open the faucet to test that no water is flowing out.
Disconnect the flexible connector pipe that attaches to the cold-water valve.
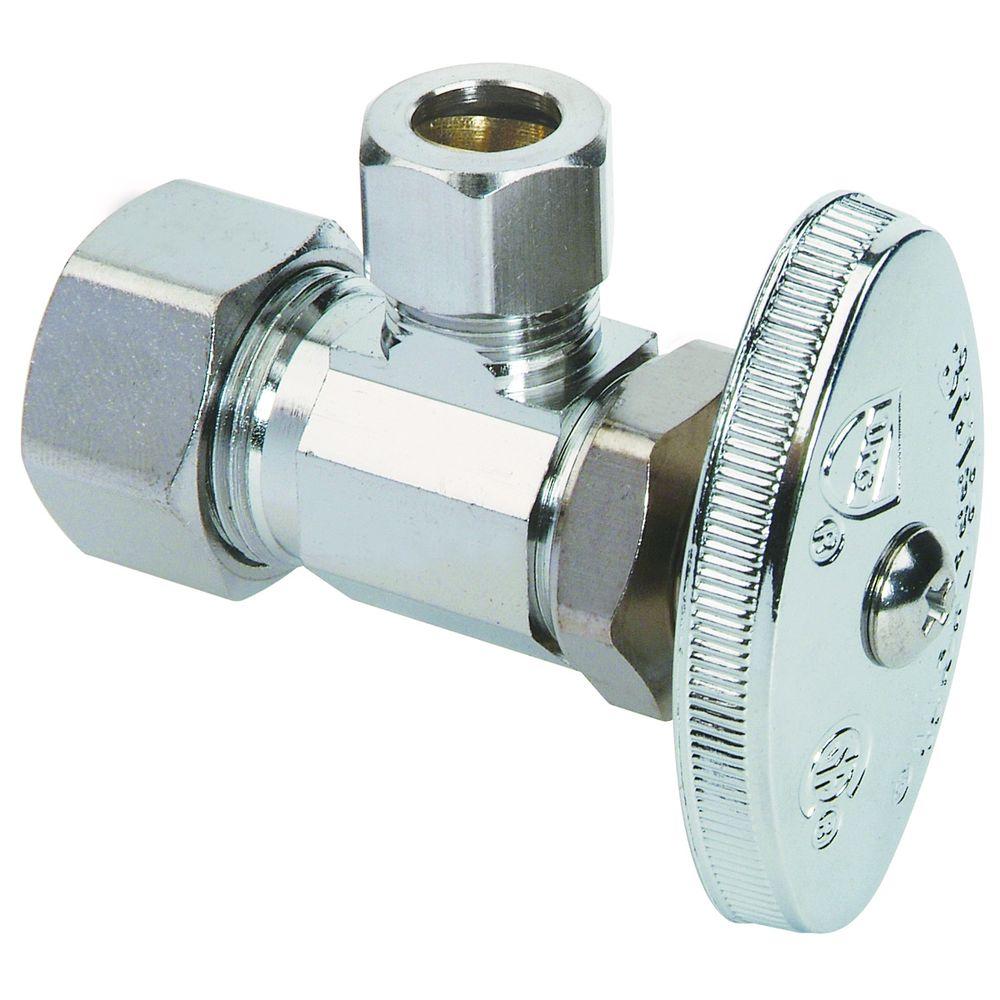
The brass MAX adapter will be attached to redirect the water line both to the sink and to the reverse osmosis filter.
Prepare the brass MAX adapter by applying the white plumber’s tape onto the threads. This will create a tighter seal and prevent leaks.
Screw in the brass MAX adapter onto the cold-water valve using the bottom female thread.
Water might drip down from the flexible water line, so have a towel handy to dry up the area.
Then screw the flexible cold-water line to the top male thread of the max adapter.
Next screw the quick connect fitting onto the last remaining male thread on the side of the MAX brass adapter.
The quick connect fittings work by pushing in tubes. Grab the ¼” black inlet tube an push it into the fitting until it is snug and can’t be pulled out.
Check that the inlet valve in the tube is off by making sure that the blue handle is perpendicular to the tube.
Dry the area and then turn on the cold-water valve by turning the handle 90 degrees. Check for leaks. Water can now flow into the sink but cannot flow out the black tube.
How to Fix a Leak
I saw a leak so I immediately closed the cold-water valve.
My leak was happening at the female thread on the bottom side of the MAX brass adapter. So I reached for my handy dandy plumbers tape and applied some to the male thread on the cold water valve.
I dried the area with the towel, reopened the cold-water valve, and tested for leaks. No leaks! That did the trick.
How to Install Filter Cartridges for a Reverse Osmosis Filter System
Next you’ll need to prepare the filter cartridges. My Reverse Osmosis unit already had them installed but I want to configure it a little bit further.
My pre-filter cartridge contains a 5 micron (μm) string wound sediment filter. For now, I live near the city and city water is usually pretty well treated for sediment so I removed the sediment filter and stored it for a future necessity.
To open the filter housing, grab the filter housing wrench and turn it counter-clockwise. Righty tighty, lefty loosey. This is how you’ll need to do maintenance in the future.
The second stage cartridge contains a MatriKX KX-CTO Carbon filter, which needs to be replaced annually.
The third stage is the reverse osmosis filter which contains a 50gpd Pentek GRO Membrane. I chose this one because it has a 1:1 waste ratio of purified water to drain water.
That means that for every cup of purified drinking water, one cup is wasted rejecting 96% of dissolved solids.
Traditional reverse osmosis membranes reject about 98% of dissolved solids but have about a 4:1 waste ratio which ends up in a lot of wasted water and money. The membrane needs to be replaced every 3 to 5 years and you can tell when it needs replacement by testing it with the TDS meter.
The fourth stage is a postfilter containing a MatriKX KX-CTO+ carbon block post-filter, which requires annual replacement.
The great thing about the RO system is that you can customize it in the future by easily replacing the filters.
There are tons of options like a filox cartridge for arsenic treatment, a calcite cartridge to remineralize and balance pH, and even a de-ionizing cartridge to get Zero TDS water.
How to Install the Reverse Osmosis Filter System Under the Sink.
I used to use this faucet mount (paid link) and carbon filter (paid link) but no more! Let’s finish installing this one of a kind filter. Take the reverse osmosis and put it under the kitchen sink.
The RO system has wall mounts you can use but I’m simply going to leave it in standing in a secure and accessible location for when I need to service it in the future.
We got passed the hardest part. The rest of the process is easy!
Grab the 1/4th inch black inlet tube we installed into the cold water valve and connect the other end into the Reverse Osmosis system through the Inlet Port on the front of the Pre-Filter housing.
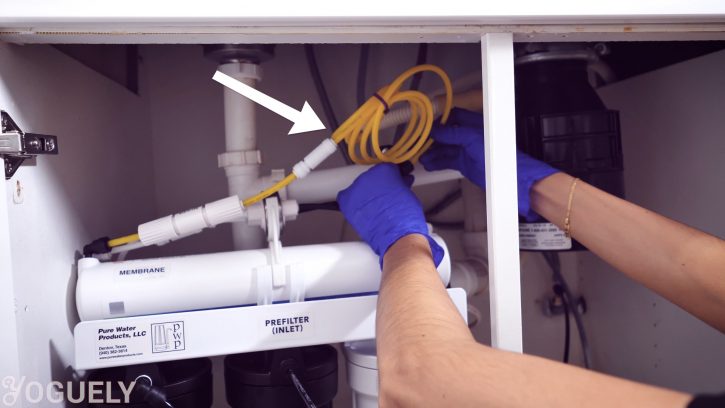
Attach the yellow drain tube, coming out of the top of the membrane, to the drain saddle installed on your drain pipe. Just push it in until it is snug.
How to Install the Ledge Faucet
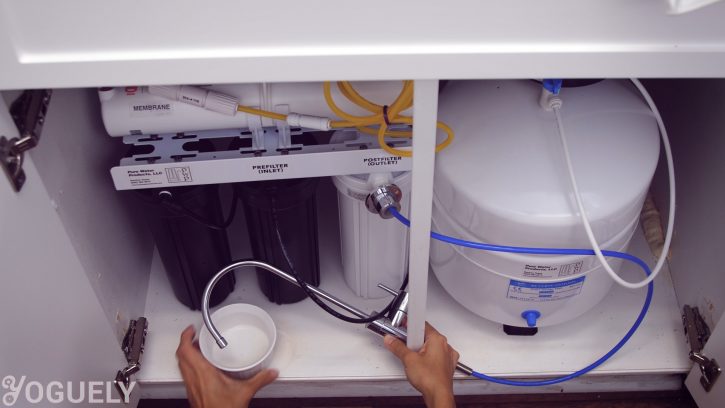
The faucet can be installed in the stainless-steel sinks by drilling a 7/8” to 1 and 1/8th inch diameter hole. I don’t want to drill a hole in my sink so I’ll be keeping the faucet under the sink in a cup for now.
To install the faucet, push the double o-ring of the faucet spout into the faucet body.
Slip down the upper chrome piece and thread it with the bottom piece that has the knob.
Slide up the bottom chrome piece through the side with the blue tubing.
The countertop sink surface would go under the faucet base followed by a black plastic washer, lock washer, then a nut. But I won’t be using that today.
Push in the faucet tube through the Outlet port on the front of the post-filter housing.
How to Install the Water Storage Tank
We are almost done! Prepare the water storage tank by first screwing down the tank valve on top of the storage tank. Do it by hand to avoid over tightening the valve. Attach the white colored water-pipe by pushing it inside the tank valve until snug.
Place the water storage tank under the sink next to the reverse osmosis system.
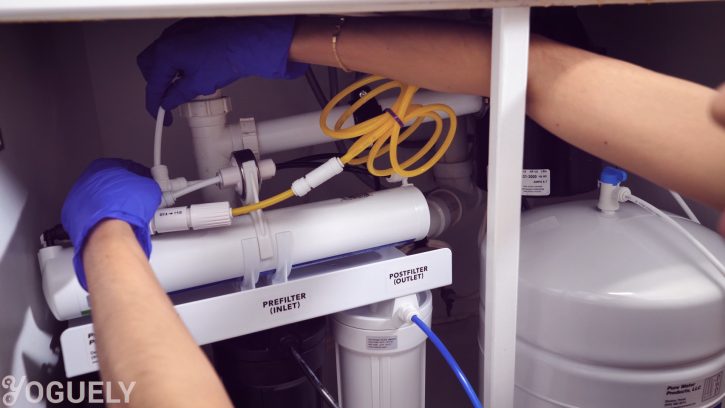
Connect the white line from the tank to the last remaining quick connect fitting to the tee fitting on the top side of the membrane.
Notice that in the front of the water storage tank there is a blue cap. Beneath the cap is a Schrader valve where you can inflate the tank with air just like you would inflate a bike tire.
Since this system is brand new, the tank has already been pre-pressurized to 7 to 8 PSI when without water.
With time, the pressure in the tank may change. You’ll notice this change if you are loosing pressure out of the faucet, the tank is not filling up, or the system is not making water. In that case you’ll need to readjust the tank pressure, which is part of regular maintenance.
Congratulations! We’ve finished making all of the connections and we are ready to start this baby (reverse osmosis system) up.
How to Initialize the Reverse Osmosis System
The idea now is to let water flow through the reverse osmosis system so that the water tank can fill and eventually water can come out of the faucet.
Leave the faucet knob closed until you are ready. First, open the blue tank valve by placing it parallel to the tubing.
Next reach behind to the cold-water valve, make sure that is open. Then make sure water can flow through the black inlet line by turning the blue handle parallel to the tubing.
Now water is starting to flow through the RO system. The unit is making noticeable gurgling and hissing sounds, and that is quite normal. While the water reaches the faucet, keep an eye out for leaks. So far so good.
After two or three minutes I started to hear water pass into the tank.
Test the Reverse Osmosis System
The tank has finally filled up which means that water will now come out of the faucet. Let’s give it a test.
Yup, working beautifully. There is quite a bit of bubbles in here (the cup of water). But that’s normal. It’s just air bubbles.
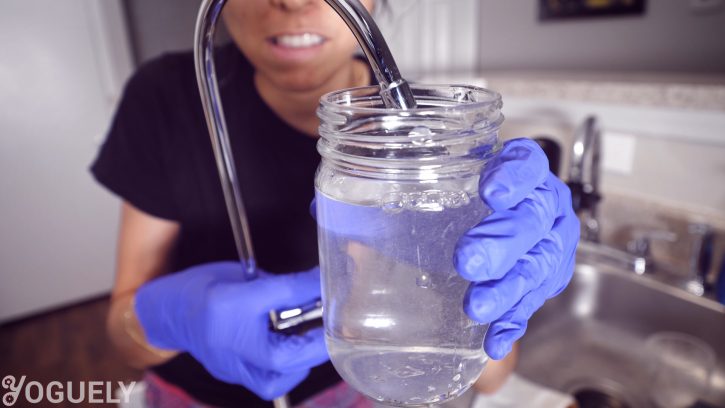
Feel free to give the reverse osmosis filtered water a taste. It will be quite a surprise from the tap water you may be used to.

El agua de ósmosis inversa hecha en casa seguramente supera el precio del agua embotellada y es mucho más rápida de crear en comparación con el agua destilada.
Finalize the Installation
To wrap things up, thoroughly rinse the membrane by letting the faucet drip for 1 hour.
Then close the faucet and let the tank fill up for 2 hours, then open the faucet and let the tank empty. The tank will empty out faster than it will fill up.
Lastly let the tank fill up once more and it is ready for use!
Way to go! You’ve succeeded in getting your very own RO system up and running. Feel free to tweet me (@Yoguely) a photo of your reverse osmosis setup or your first impressions taste test.
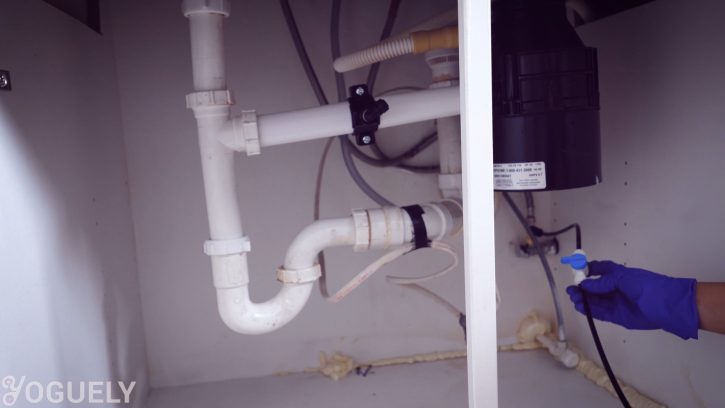
Add a Leak Alarm Below the Reverse Osmosis Filter
Over time, it may be possible for materials to degrade, or attachments to loosen up, which can result in a leak. If the leak is left for hours unchecked, it could lead to a flood that damages wooden cabinets and floors.
A nice addition for safety and piece of mind is adding a drain pan underneath the filter system and a leak alarm (paid link).
Use a drain pan to collect water in case of a leak. Place the leak alarm’s sensor in the drain pan. Place the leak alarm on an elevated surface to avoid it from catching water. For instance, you can attach it to a wall with a Hook & Loop.
When the leak alarm detects even a small amount of water, it activates an insanely loud 120 dB alarm that can catch your attention whether you are far away from the kitchen or in deep slumber.
The leak alarm uses a 9 Volt battery that last about 1 year.
Test the Water Quality
Now the question I have as an engineer is, How clean is this reverse osmosis water? and how does it compare to the tap water coming out of my sink?
To stay tuned, join our newsletter and get the latest content straight to your inbox.
If you found this tutorial helpful or have any questions, let me know in the comments below or join the discussion in the Yoguely Community Forum.
I’m Aida Yoguely. Thanks for reading. And I’ll see you in the next post. That’s all folks!
Video

Be sure to subscribe and hit the notification bell to stay tuned for the latest videos.
References
P-Trap image http://www.kettleandcord.com/shop/uncategorized/aqua-plumb-1-1-2-p-trap-c2200/
Faucet image https://www.purewaterproducts.com/img/lf701_306.jpg
If you've enjoyed this post then please Buy Me a Coffee or Join the Channel to support the site!
- Why Helicopter Money Is Inflationary - 2021-10-09
- How Interest Rates Affect Inflation - 2021-10-08
- How Long Has Inflation Existed? - 2021-10-01


One Comment
ric
You can’t connect a saddle valve to the drain line for the RO discharge without an approved airgap device as per IPC Section 611.2 plus why on earth would you connect it on the side versus the top?